
How to Record Time on a Task

Starting a Timer​

There are two ways you can record time associated with a task.

On the dashboard page, you can click the Play button to begin a timer.

The screenshot displays a section of the Mirah Collaborative Care interface focused on task management. At the top left, the text 'Unspecified Task' indicates the task's title, with a creation date of 'Created Sep 18' below it. On the right side, there are two buttons: a play button enclosed in a red border, which likely starts or records time for the task, and a stop button next to it, which likely stops the time recording. These buttons are essential for tracking time spent on the task.

On the Task card, you can click "Begin Task" on any Active task.
You can do this as long as you do not have a timer actively recording time.
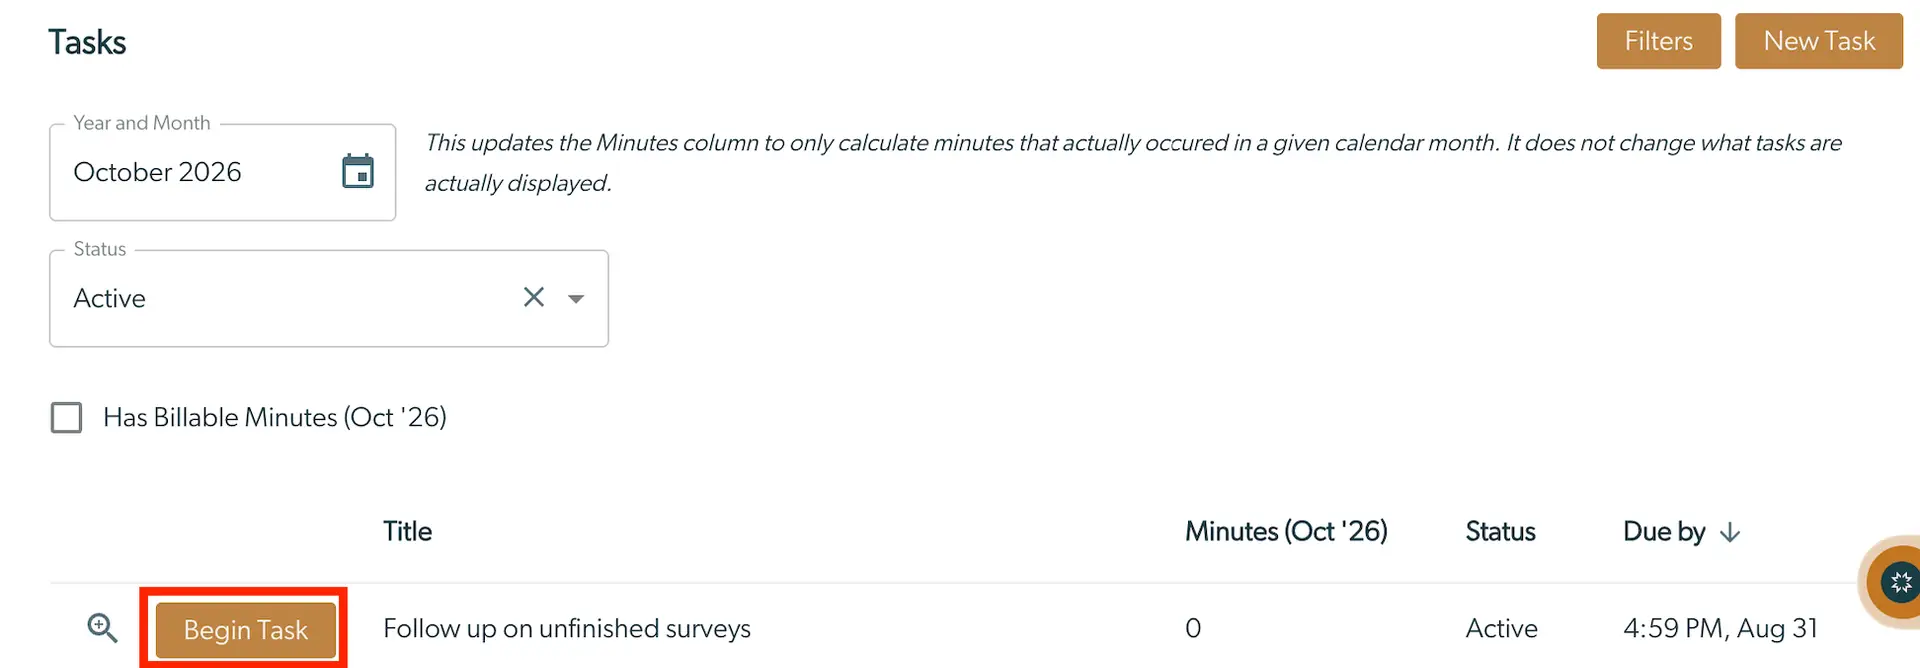
The screenshot displays the 'Tasks' interface of the Mirah Collaborative Care platform, focusing on recording time on a task. At the top, there are two buttons: 'Filters' and 'New Task' located on the right. Below, there are fields for 'Year and Month' set to October 2026 with a calendar icon for selection, and 'Status' set to Active with a dropdown for other options. A checkbox labeled 'Has Billable Minutes (Oct '26)' is present for filtering tasks with billable minutes. The task list shows a task titled 'Follow up on unfinished surveys' with columns for 'Minutes (Oct '26)' showing 0, 'Status' as Active, and 'Due by' at 4:59 PM, Aug 31. A 'Begin Task' button is prominently displayed in orange on the left side of the task row, allowing users to start tracking time for the task.

Once you are done, you can save time in the same way as when you save a timer, but you can also change the Task Template.
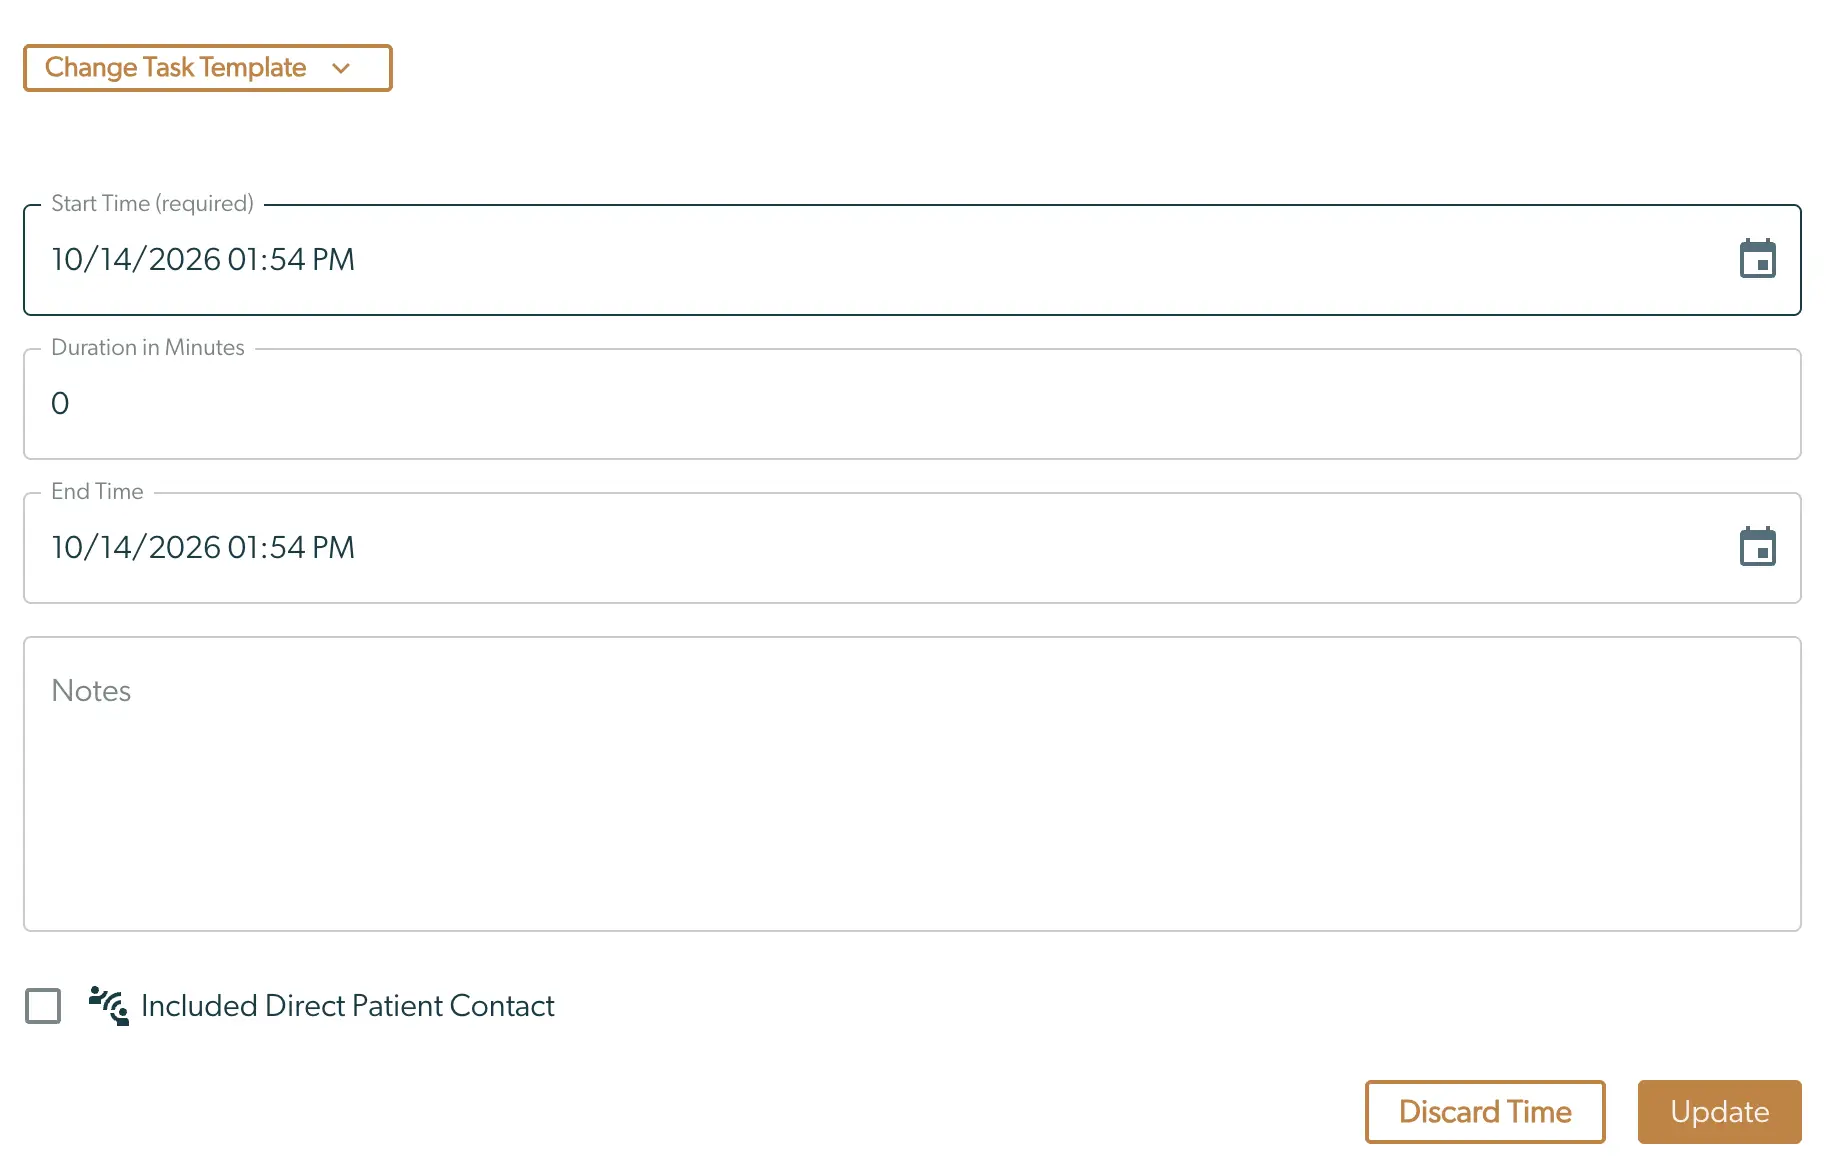
The screenshot displays a user interface for recording time on a task within the Mirah Collaborative Care platform. At the top, there is a dropdown button labeled 'Change Task Template' for selecting different task templates. Below, there are fields for entering the 'Start Time' and 'End Time', both with calendar icons for date selection. The 'Duration in Minutes' field is editable and currently set to 0. A large text area labeled 'Notes' allows for additional comments. A checkbox labeled 'Included Direct Patient Contact' is available for selection. At the bottom right, there are two buttons: 'Discard Time' and 'Update', used to either discard the entered time or update the task with the new information.

Manually Add Past Time​

You can manually add time by opening a task and clocking "Log Time". You can do this as long as you do not have a timer actively recording time.
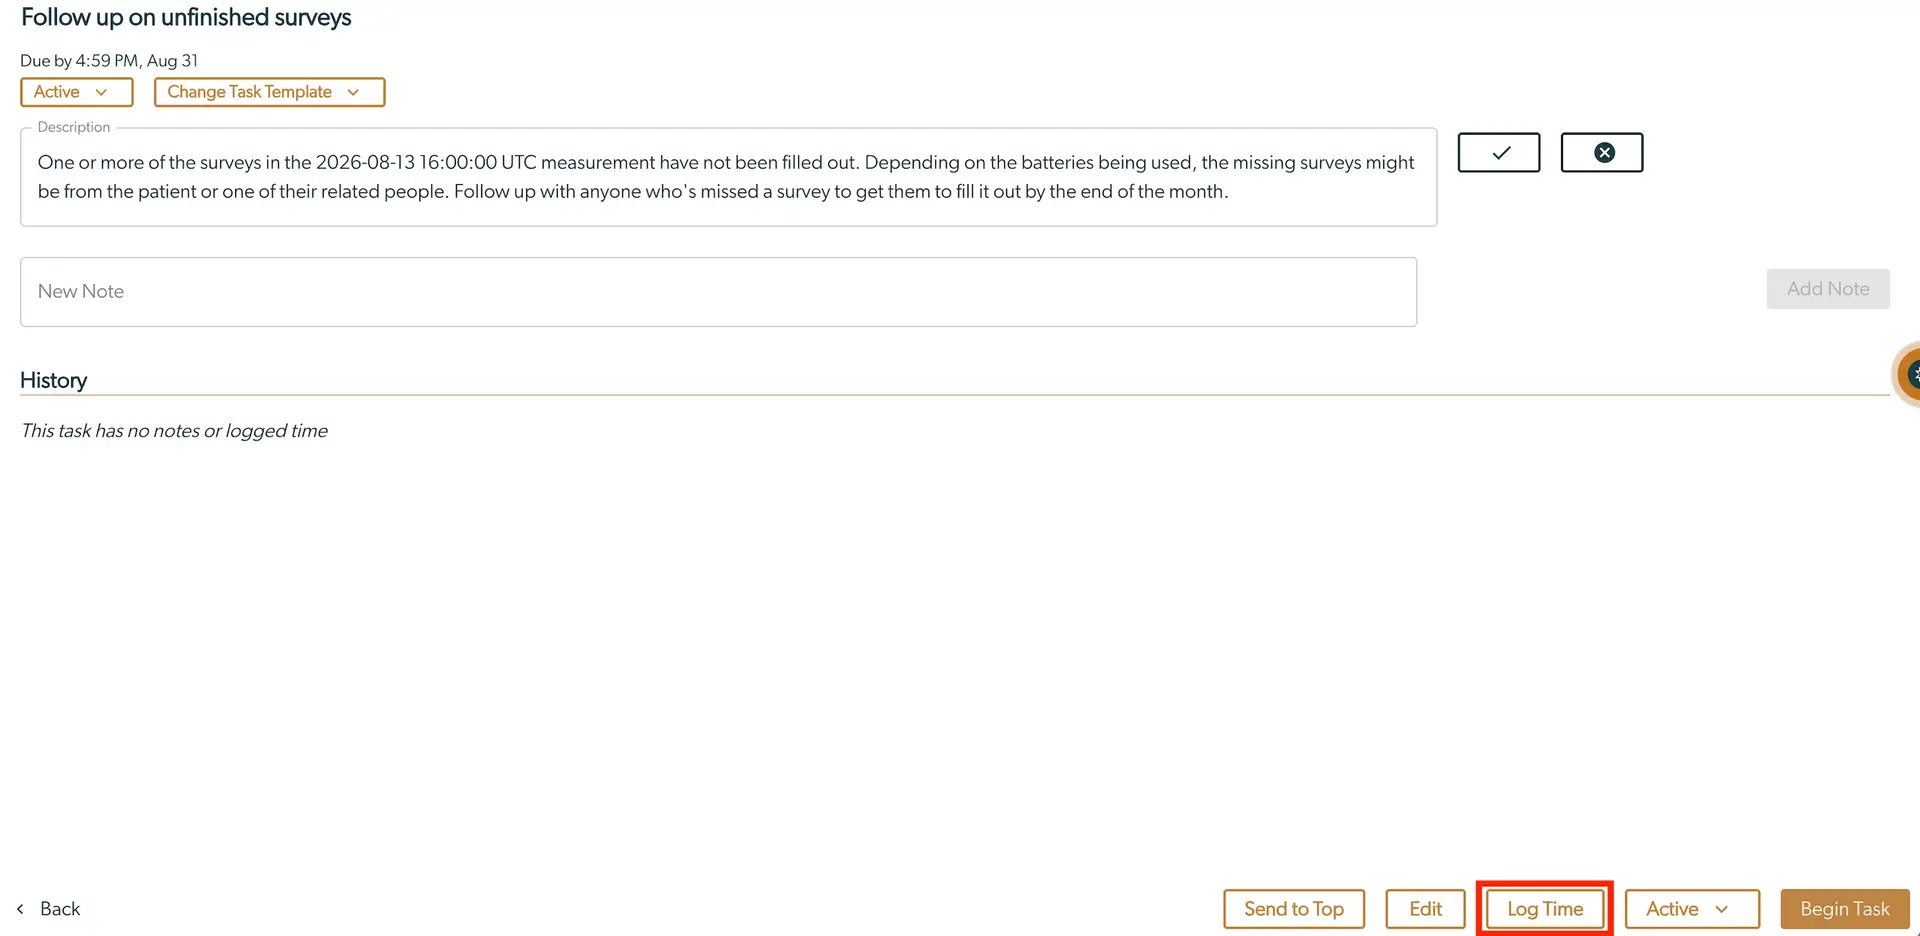
The screenshot displays the 'Follow up on unfinished surveys' task page within the Mirah Collaborative Care platform. The task is due by 4:59 PM on August 31. At the top, there are dropdown menus labeled 'Active' and 'Change Task Template' for managing task status and templates. Below is a description box explaining the task details, followed by a text field labeled 'New Note' for adding notes, with an 'Add Note' button to the right, currently disabled. The 'History' section indicates no notes or logged time for this task. At the bottom, there are several buttons: 'Send to Top', 'Edit', 'Log Time' (highlighted in red), 'Active' (with a dropdown), and 'Begin Task', used for task management and time logging.

Here, you can add in the time by Start Time and Duration, add Notes, mark the Task as Done, specify it if includes Patient Contact, and change the Task Template.
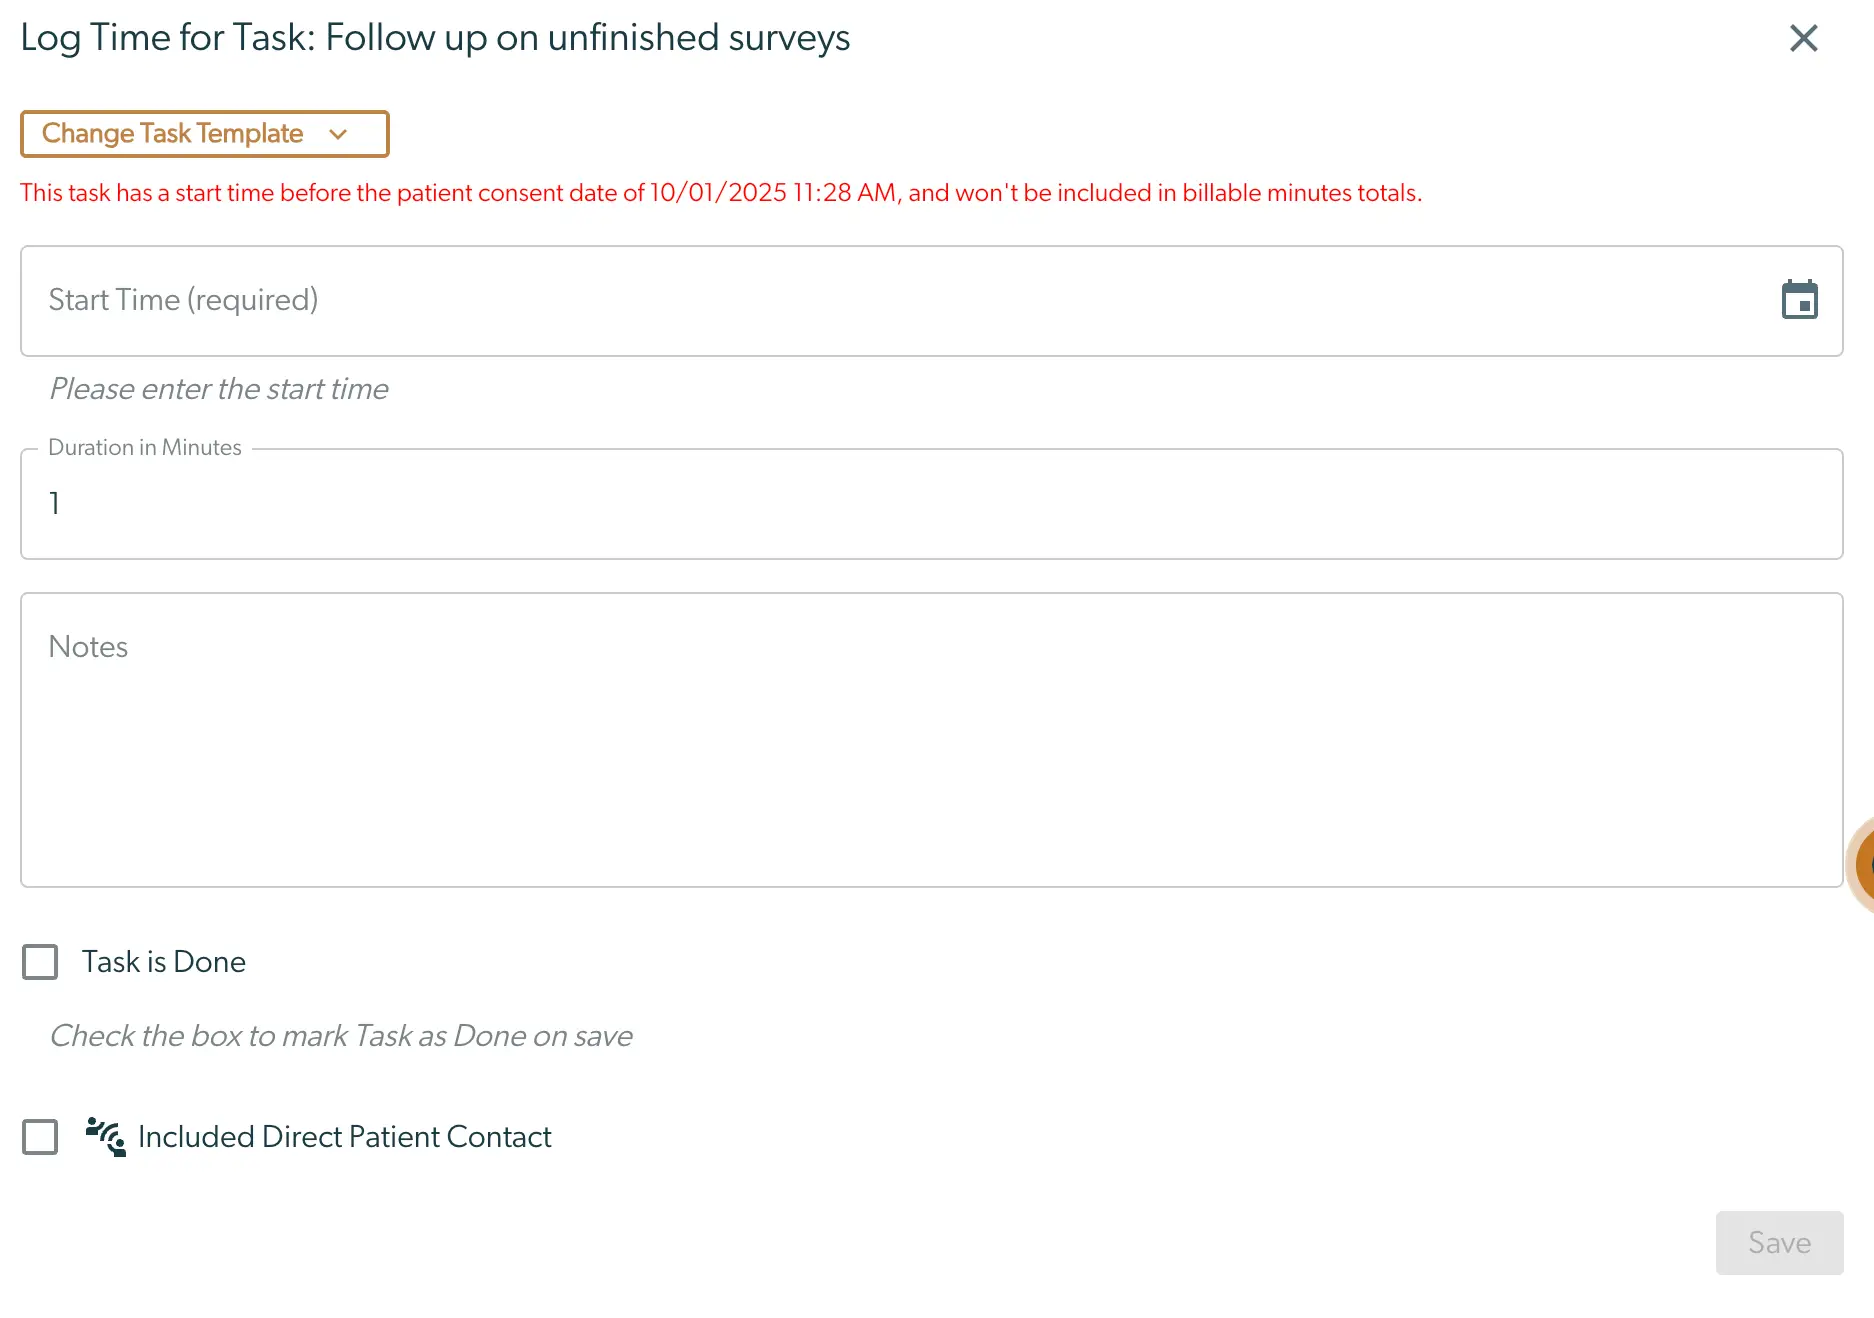
The 'Log Time for Task: Follow up on unfinished surveys' screen allows users to record time spent on a specific task. At the top, there is a 'Change Task Template' button for selecting different task templates. Below, a red warning message indicates that the task start time is before the patient consent date and will not be included in billable minutes. The 'Start Time' field is required and includes a calendar icon for date selection. The 'Duration in Minutes' field is pre-filled with '1'. A 'Notes' section is available for additional comments. Two checkboxes are present: 'Task is Done' to mark the task as completed upon saving, and 'Included Direct Patient Contact' to indicate patient interaction. The 'Save' button is located at the bottom right to save the entered information.