
How to customize quick tasks for your organization

What are quick tasks?​

Quick tasks are preconfigured templates that can be used to quickly create the same type of task for all users across your organization. Quick tasks can be used for activities that are done repeatedly during the collaborative care lifecycle.

How to customize quick tasks for your organization?​

1.) On the left hand side menu of the application, click on "Configuration". Select “Quick Tasks”.
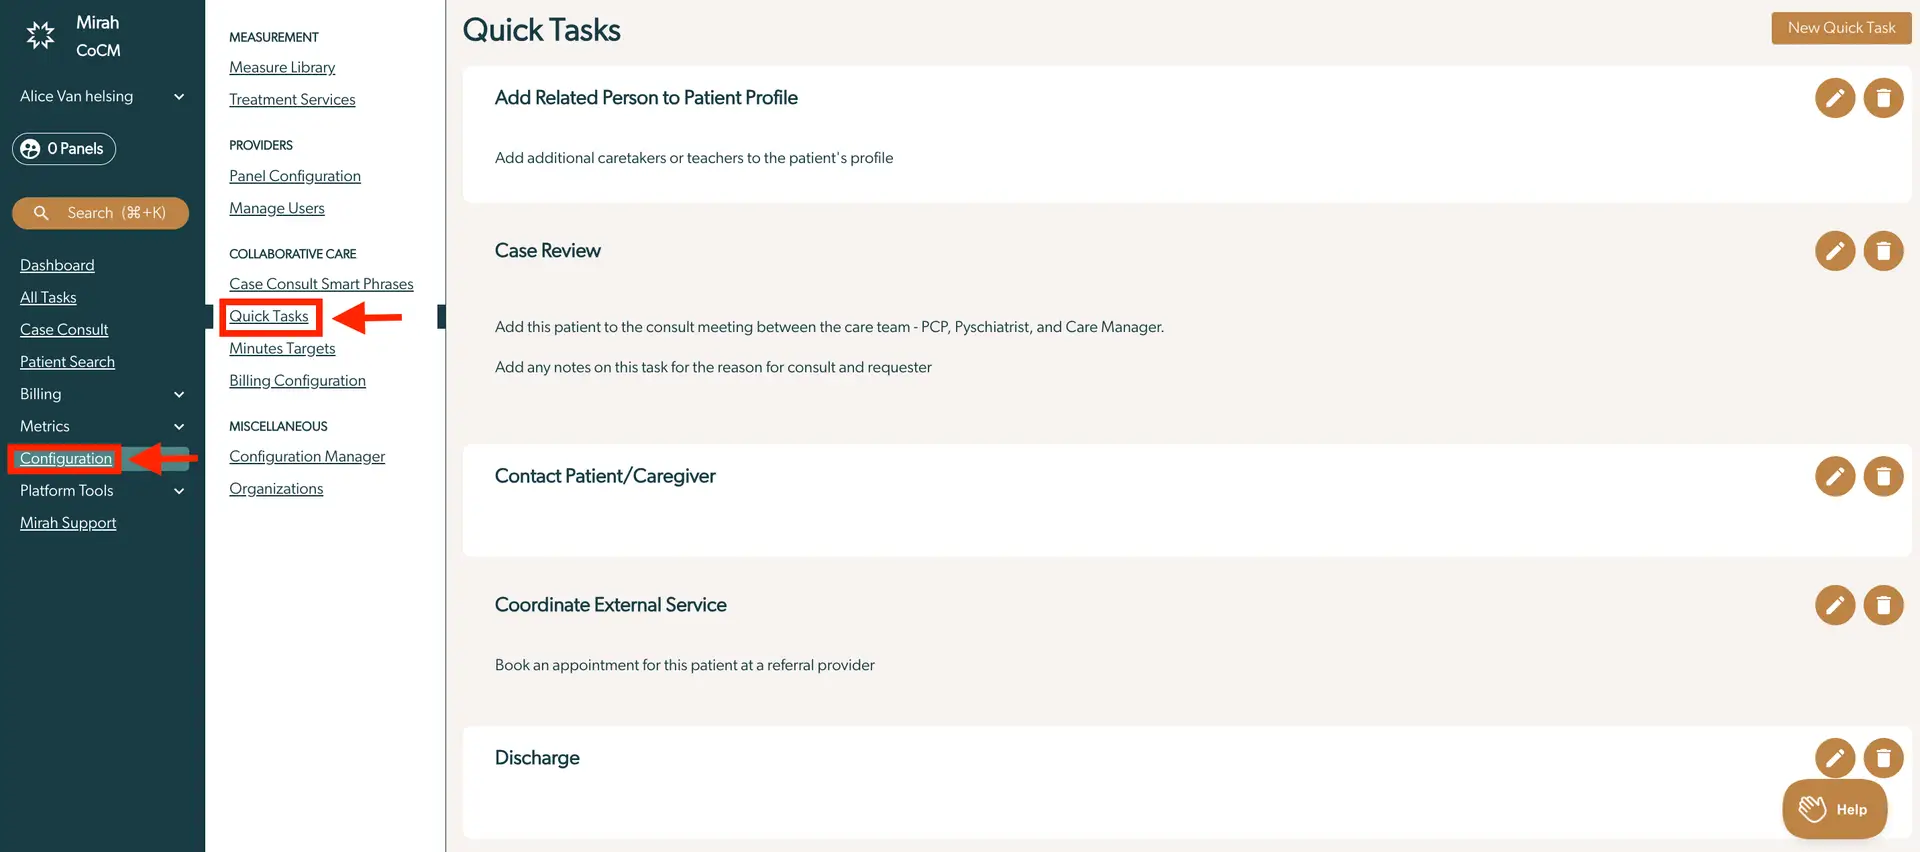
The screenshot displays the Quick Tasks configuration page within the Mirah Collaborative Care platform. On the left side, there is a navigation menu with options such as Dashboard, All Tasks, Case Consult, Patient Search, Billing, Metrics, Configuration, Platform Tools, and Mirah Support. The Configuration section is expanded, showing sub-options like Case Consult Smart Phrases, Quick Tasks, Minutes Targets, Billing Configuration, Configuration Manager, and Organizations. The main area of the screen lists several quick tasks including 'Add Related Person to Patient Profile', 'Case Review', 'Contact Patient/Caregiver', 'Coordinate External Service', and 'Discharge'. Each task has a description and is accompanied by two buttons on the right side: a pencil icon for editing and a trash can icon for deleting. At the top right corner, there is a 'New Quick Task' button for adding new tasks. A 'Help' button is located at the bottom right corner of the screen.

2.) There are several quick tasks that have been created for your organization by default. You can click on the edit (pencil icon) or delete (trashcan icon) buttons to update these existing quick tasks

3.) To create a new quick task, click “New Quick Task” on the top right of the page
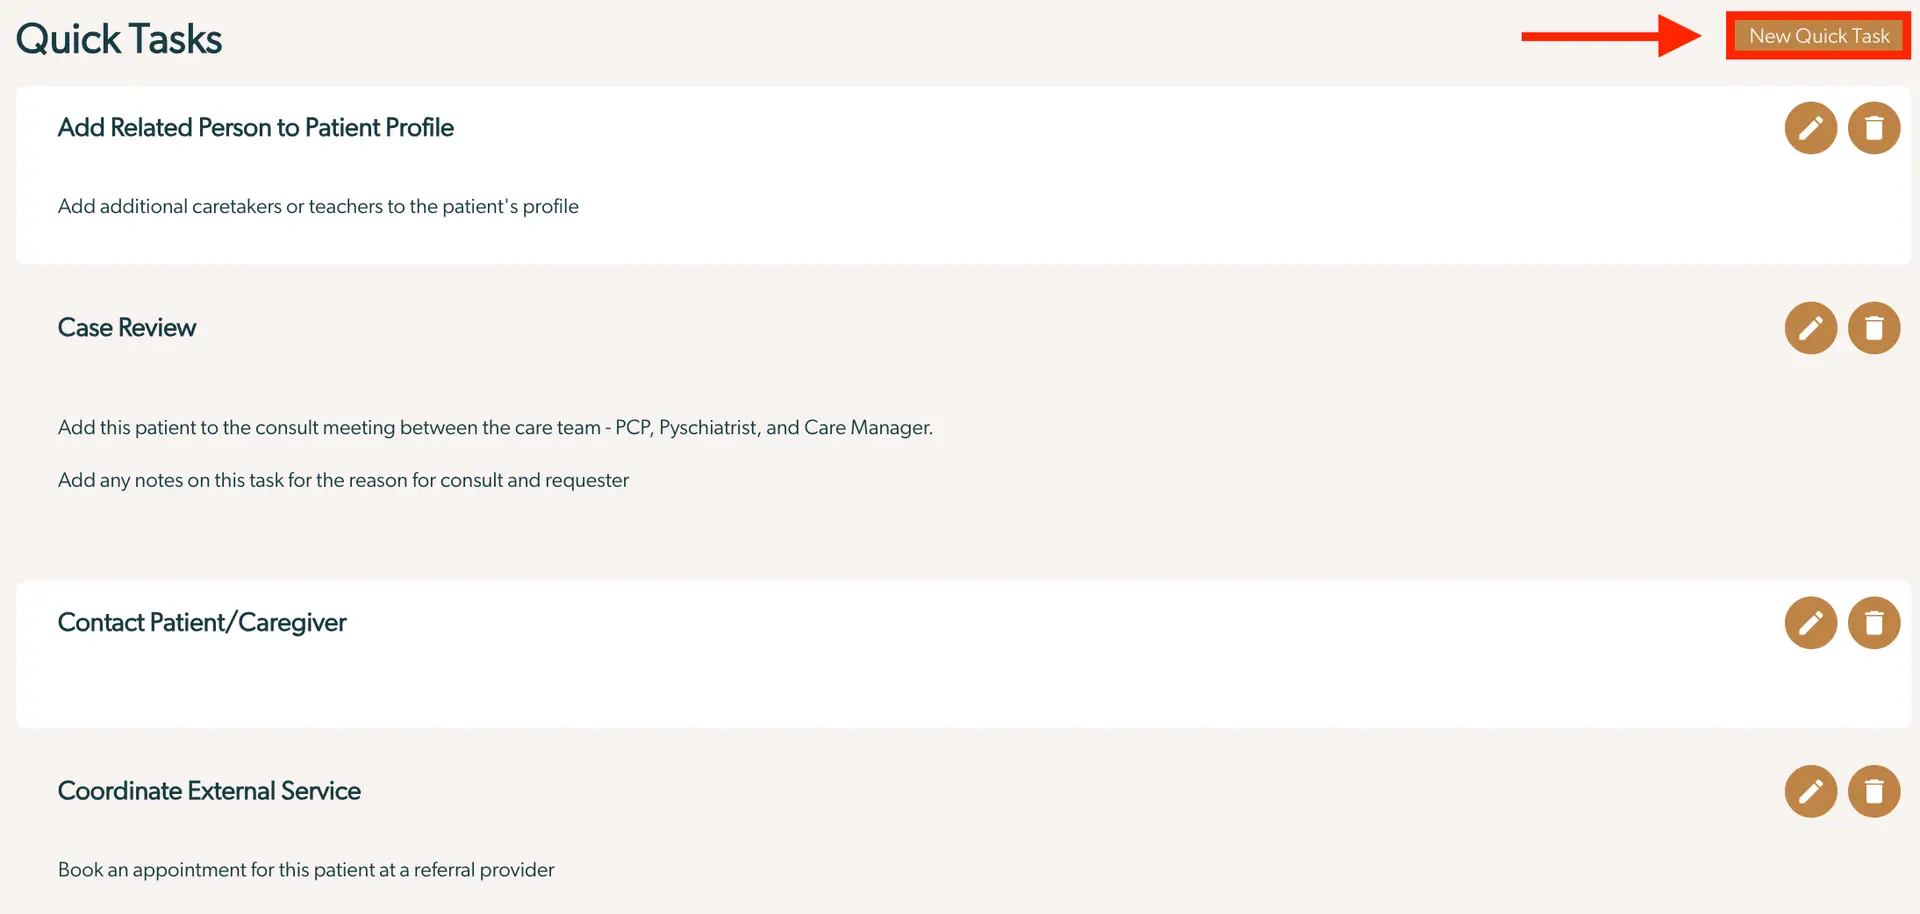
The screenshot displays the 'Quick Tasks' section of the Mirah Collaborative Care platform, which allows users to manage and customize tasks for patient care. The screen lists several tasks including 'Add Related Person to Patient Profile', 'Case Review', 'Contact Patient/Caregiver', and 'Coordinate External Service'. Each task has a brief description explaining its purpose, such as adding caretakers to a patient's profile or booking appointments with referral providers. To the right of each task, there are two icons: a pencil icon for editing the task and a trash can icon for deleting it. At the top right corner of the screen, there is a 'New Quick Task' button, highlighted in orange, which allows users to create a new task.

4.) Enter a “Title” and “Body” for the quick task

5.) In order for default tasked to automatically account for patient facing time, check the "Time Entries Default to Direct Patient Contact" option.

  • Please Note: Even if the task template has this checkbox selected, you will manually need to click the checkbox again if the Quick Task is already started and progress has been saved without an attached template. For instance, a user begins a Quick Task and saves the progress WITHOUT checking the "Include Patient Facing Time" box. From there, they apply a task template WITH a default for direct patient contact. The Quick Task will not automatically select this checkbox and users must check it themselves.
  • The "Included Direct Patient Contact" checkbox directly impacts the "Last Patient Contact" field. Therefore, "Last Patient Contact" is determined by the last task with the "Included Direct Patient Contact" checkbox selected.

6.) You can configure your tasks so that when you select a task to begin, it will automatically take you to the appropriate page. from the dropdown menu, select an action to take when the task is started.

7.) Click “Save”.

The 'New Quick Task' screen allows users to create a task within the Mirah Collaborative Care platform. At the top, there is a field labeled 'Title' for entering the name of the task, followed by a larger 'Body' field for detailed task information. Below these fields, there is a checkbox labeled 'Time Entries Default to Direct Patient Contact' which can be selected to set the default time entry behavior. The screen also includes a dropdown menu labeled 'Action to take when task is started' with options such as 'Go To Case Consult', 'Go To Feedback Report', 'Take No Action', 'Go To Patient Details', 'Go To Request Case Consult', and 'Go To Task Details'. This dropdown is located beneath the checkbox and allows users to specify the action that should be triggered when the task begins. The 'X' button at the top right corner of the screen is used to close the task creation window.

8.) This quick task will now be available when creating a new task for any patients in your organization.