
Outcomes Framework - Create a Metric

In order to create a new metric, select the "Explore & Create New Metrics" from the top right of the Outcomes Dashboard.

The screenshot displays a section of the Mirah Collaborative Care interface focused on creating a metric within the Outcomes Framework. It includes fields for selecting a 'Start Month' and 'End Month', both set to August 2024 and August 2025 respectively, with calendar icons for date selection. There is an 'Entities' dropdown with 'CoCM' selected, and a search bar for additional filtering. A button labeled 'Show 0 Filters' is located to the right, allowing users to view applied filters. The 'Clear Filters' option is available to reset selections. A prominent 'Explore & Create New Metrics' button is highlighted in orange on the far right, guiding users to initiate the creation of new metrics.

You will then have the option to either start from scratch with a blank metric, or use one of Mirah’s existing templates:
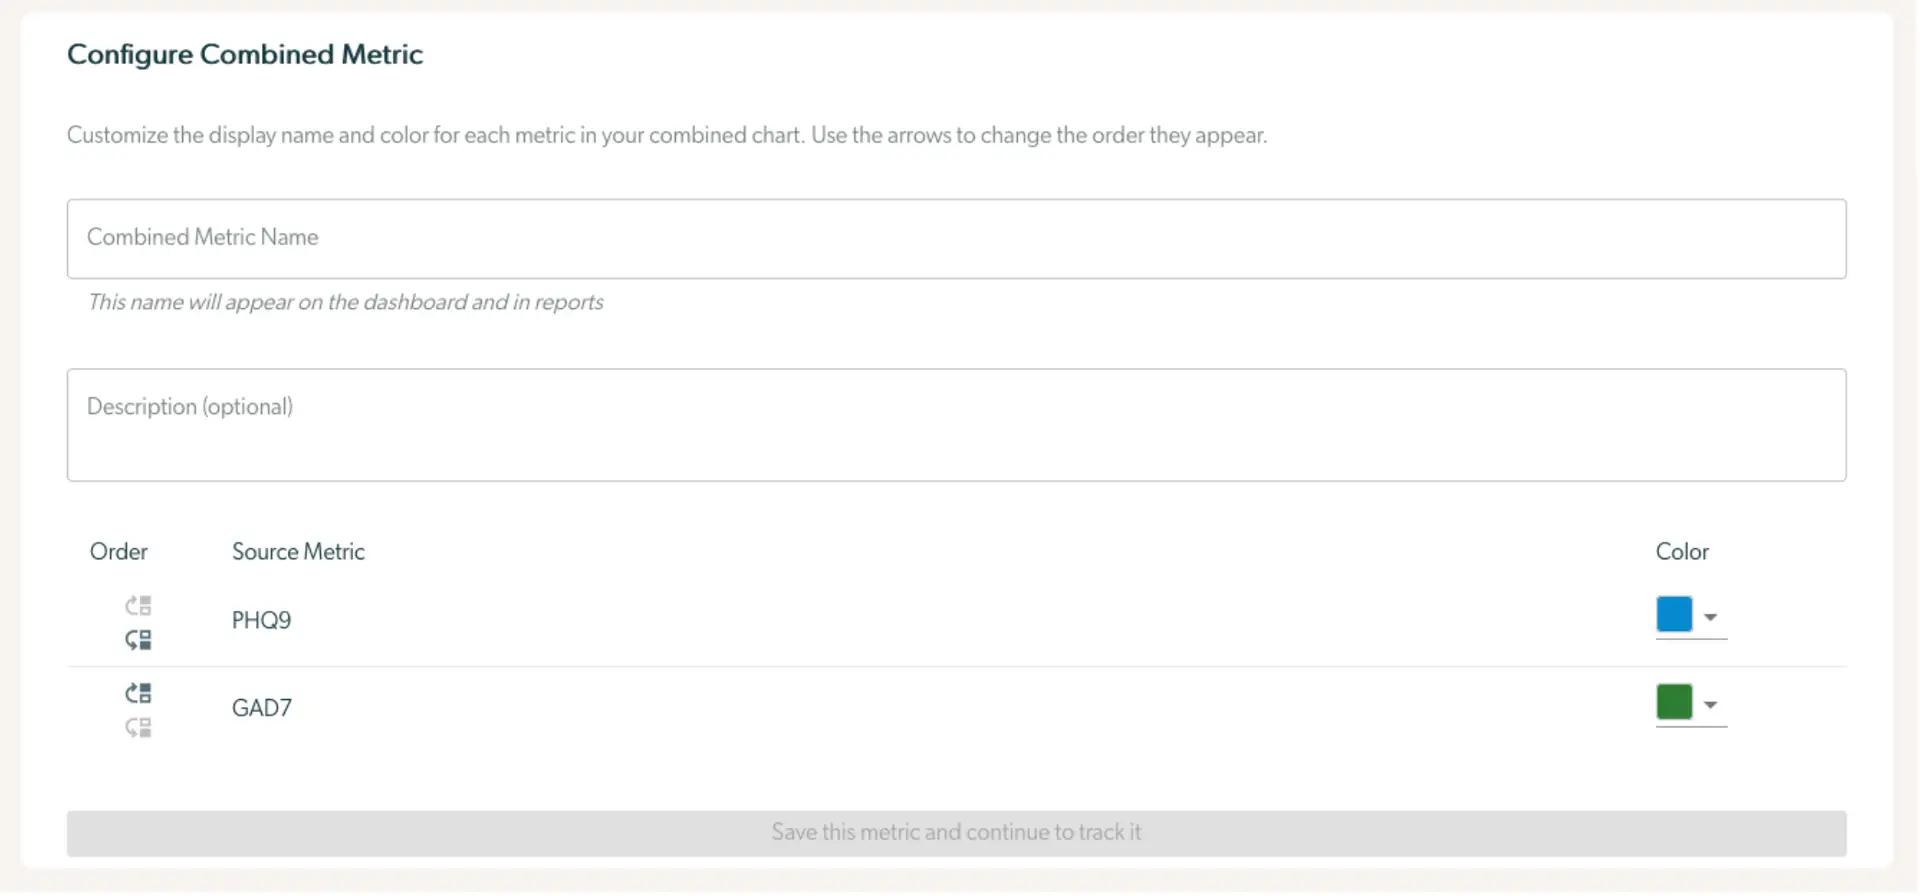
The 'Configure Combined Metric' screen allows users to customize the display name and color for each metric in a combined chart. Users can enter a 'Combined Metric Name' in the provided text field, which will appear on the dashboard and in reports. An optional 'Description' field is available for additional details. Below, there is a table listing the order and source metrics, such as 'PHQ9' and 'GAD7', with corresponding color selectors. Users can adjust the order of metrics using arrows. At the bottom, a button labeled 'Save this metric and continue to track it' is centered, allowing users to save their configurations.

Starting with a template​

If you start with a predefined template, statistics will immediately be available on the right hand side.

You may choose to change the metric before either downloading the data or saving the metric for continued monitoring.

Creating a metric from scratch​

If you decide to create a metric from scratch, you will have to enter several key pieces of information before any statistics are visible:

  • You must select the mode of metrics between single-scale metric and multi-scale metric.
  • You must select one or more scales, for example the PHQ-9.
  • You must select whether you are creating an Effectiveness or Efficiency Metric. If you are unsure which makes most sense, you should read Types of Metrics.
  • For a Effectiveness Metrics you must select:
  • For a Efficiency Metrics you must select:
  • You must select whether the metric should be displayed as a line chart or a column chart. Line charts are best used when you want to see how a single value changes over time, while column charts are best used to compare distinct values.

Once you have selected these details, statistics will appear on the right hand side of the page in the "Statistics" section which can be understood here.

See how to download this data for analysis here.

Creating a Combined Metric​

To create a combined metric, enter the following information:

First, select the metrics you want to combine from the metric search:

The screenshot shows a section of the Mirah Collaborative Care interface where users can create a metric by combining multiple outcomes. It features a radio button labeled 'Combine multiple outcomes' on the left. To the right, there is a dropdown menu labeled 'Select a metric' containing selected metrics 'PHQ9' and 'GAD7', each with an 'X' button next to them for removal. The dropdown arrow is located on the far right, allowing users to add more metrics.

Then, give the metric a name and select a color for each individual metric you're combining:
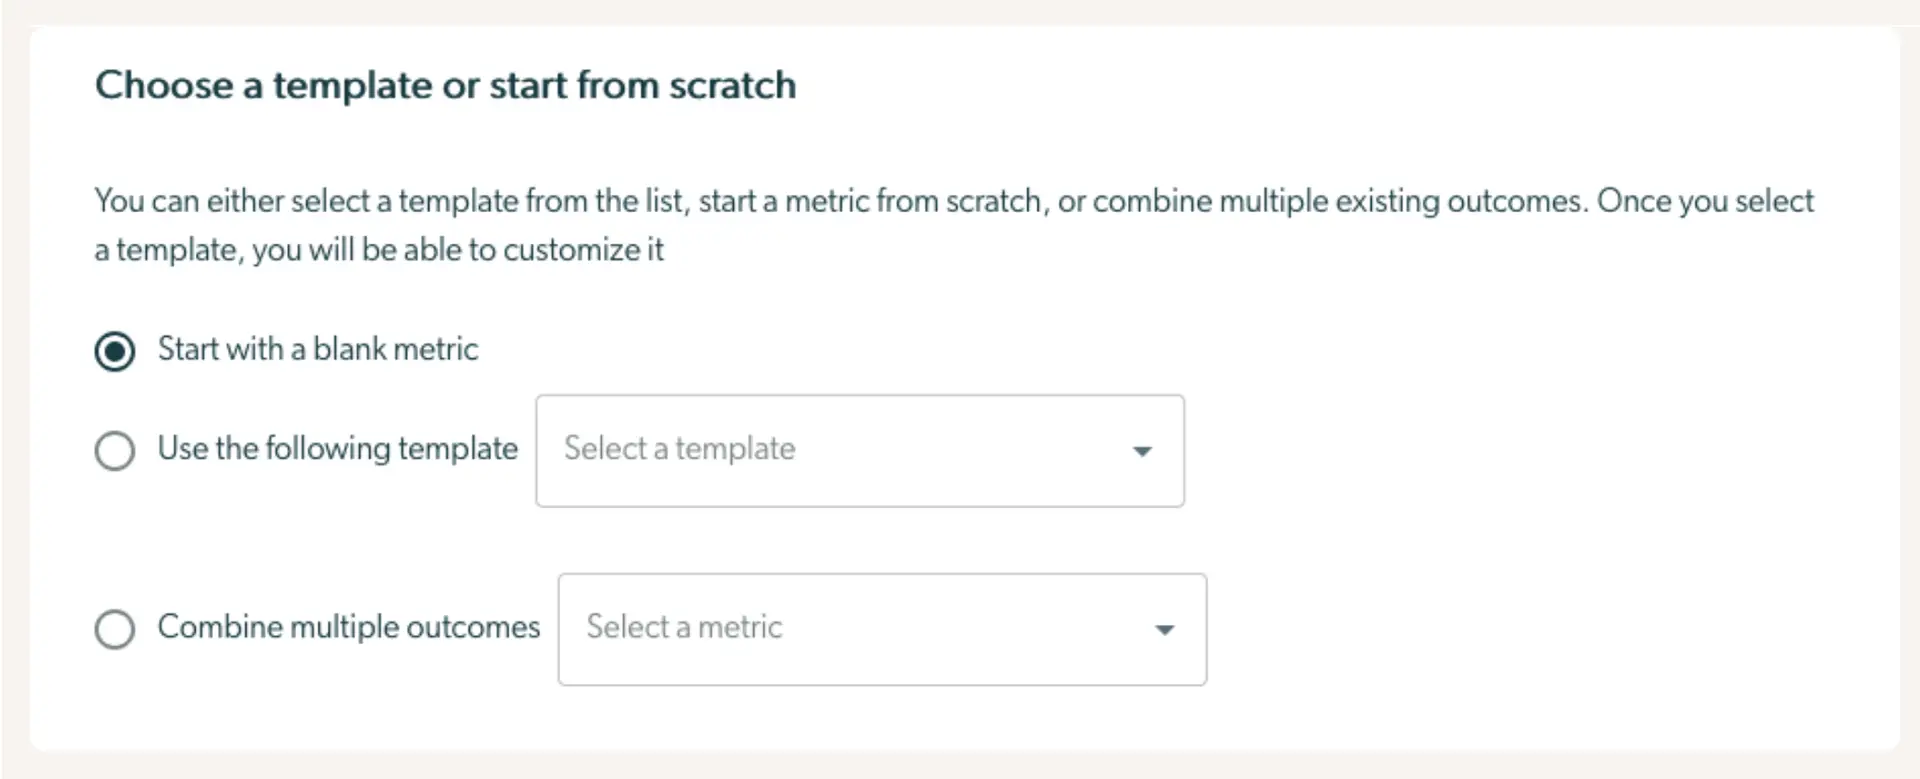
The screenshot displays a section of the Mirah Collaborative Care platform where users can create a new metric within the Outcomes Framework. The interface offers three options: 'Start with a blank metric', 'Use the following template', and 'Combine multiple outcomes'. The first option is selected by default. The second option includes a dropdown menu labeled 'Select a template', and the third option includes a dropdown menu labeled 'Select a metric'. These options allow users to either start from scratch, use a predefined template, or combine existing outcomes to create a new metric.

Saving metric for continued monitoring​

If you want to continue to monitor the metric, you can press "Save this metric and continue to track it" at the bottom of the "Configure Your Metric" section.

The screenshot shows a button labeled 'Save this metric and continue to track it'. This button is likely part of the 'Outcomes Framework - Create a Metric' feature within the Reporting & Analytics section of the Mirah Collaborative Care platform. The button is designed to save the current metric being created and enable ongoing tracking, facilitating measurement-based care and collaborative care processes.

You will be asked to give the metric a name. Once you save it, it will become available on the Metric Dashboard.
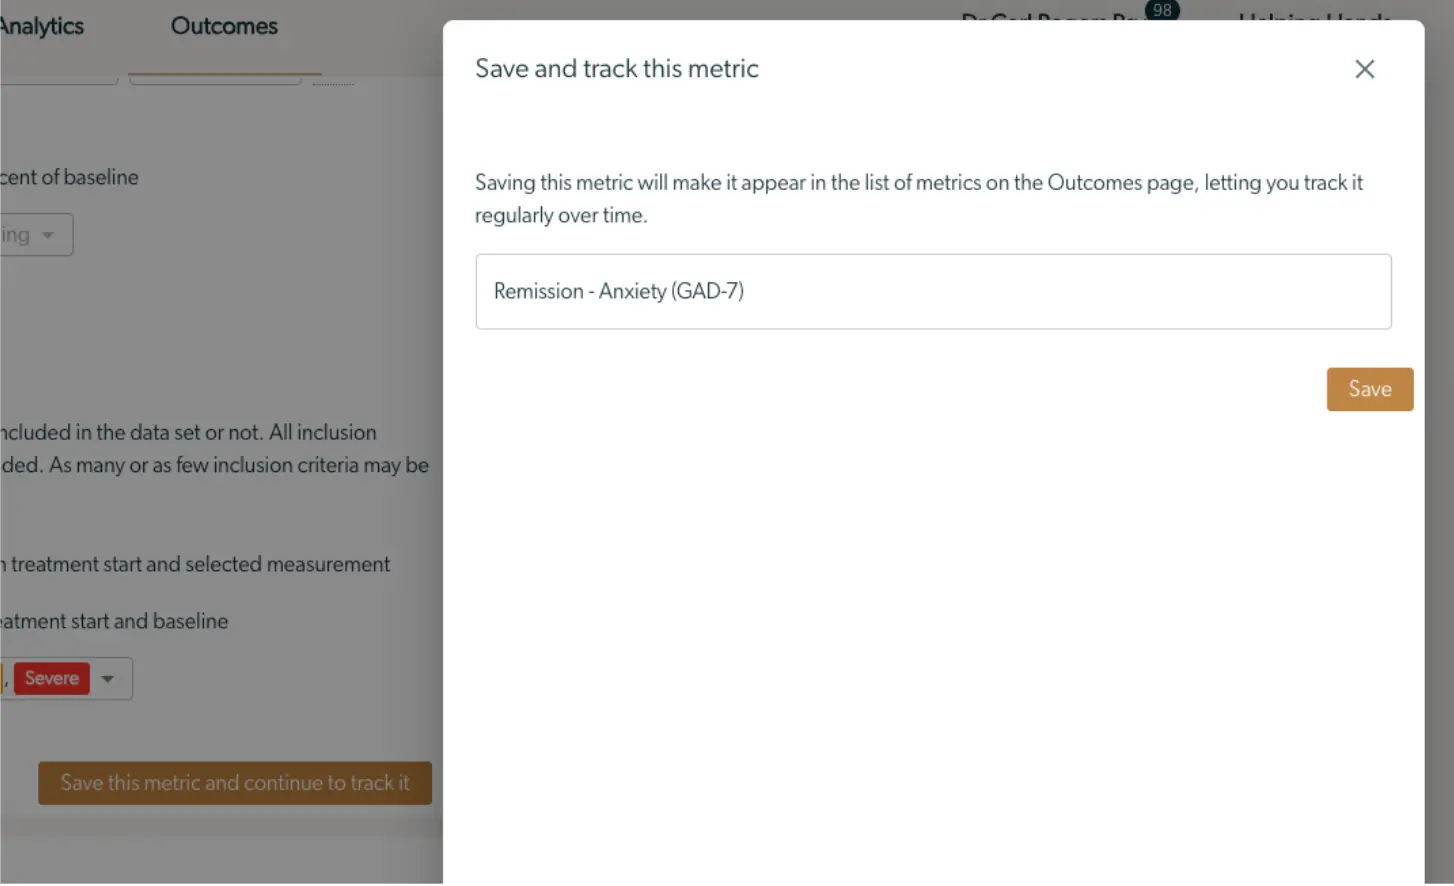
The screenshot shows a dialog box titled 'Save and track this metric' within the Mirah Collaborative Care platform. This feature is part of the Reporting & Analytics section, specifically under the Outcomes Framework for creating a metric. The dialog explains that saving the metric will allow it to appear in the list of metrics on the Outcomes page, enabling regular tracking over time. There is a text input field pre-filled with 'Remission - Anxiety (GAD-7)' indicating the metric being created. To the right, there is a 'Save' button for confirming the action, located at the bottom right of the dialog box.