
How to Edit a Series of Recurring Appointments

Identifying Recurring Appointments​

1). On Patient Page, click Details on a Past or Upcoming Session

The screenshot displays two sections labeled 'Past Sessions' and 'Upcoming Sessions' for managing appointments in Mirah Measurement-Based Care. In the 'Past Sessions' section, there is an appointment dated March 19th at 12:45 pm with the status 'Waiting for Response'. It includes tags for CAMS, Goals, PHQ-9, and Events, along with an estimated completion time of 12 minutes. Below these details, there are three buttons: 'Details', 'Edit', and 'Instant Login'. The 'Details' button is highlighted in red and is located on the left, followed by the 'Edit' button in the center, and the 'Instant Login' button on the right. In the 'Upcoming Sessions' section, there is an appointment scheduled for March 26th at 12:45 pm with the status 'Scheduled'. It shows that the session is 'Not yet planned' and includes a 'Details' button highlighted in red, an 'Edit' button, and an 'Instant Login' button, arranged similarly to the 'Past Sessions' section. The 'Show Predictions' link is located at the top right of the 'Upcoming Sessions' section.

2). If this session is part of a series of recurring appointments, it will say Recurrence: ... at the top of the Status section. If it does not say this, you can make this a series of recurring appointments using the similar steps as how to edit the series.
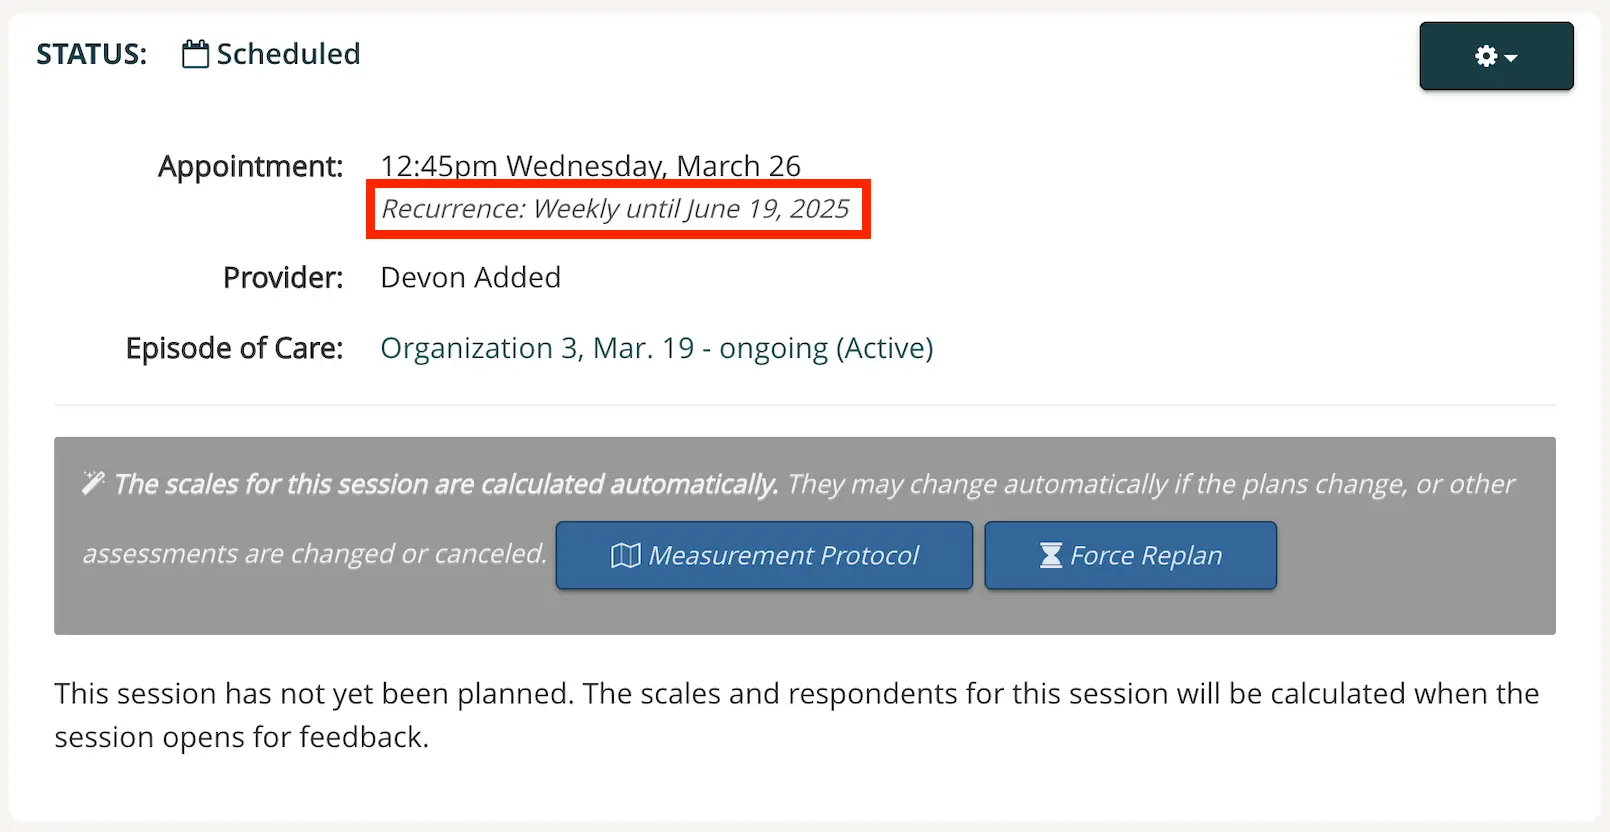
The screenshot displays a scheduled appointment within the Mirah Measurement-Based Care platform. The status of the appointment is indicated as 'Scheduled' at the top left, accompanied by a calendar icon. The appointment details include the time and date, '12:45pm Wednesday, March 26', with a recurrence pattern noted as 'Weekly until June 19, 2025', highlighted in red. The provider for this appointment is 'Devon Added'. The episode of care is linked to 'Organization 3, Mar. 19 - ongoing (Active)', which is clickable. Below these details, there is a gray information box stating that 'The scales for this session are calculated automatically' and may change if plans or assessments are altered. Two blue buttons are present below this message: 'Measurement Protocol' and 'Force Replan', both likely used for managing the session's parameters. The bottom of the screen notes that the session has not yet been planned and that scales and respondents will be calculated when the session opens for feedback.

3). From here, you can either Create, Edit, or Delete a series.

Create a Series of Recurring Appointments​

If making an appointment for the first time, use all these steps. If editing an existing appointment, skip to Step 2.​

1). If making an appointment for the first time, click Schedule Session. Then skip to Step 3.

The screenshot displays a user interface for managing appointments and reports for a client named Victor Hugo. At the top, the client's name is shown with an icon representing a user. Below the name, there is a series of buttons for different actions. The 'Report' button is prominently displayed at the top, allowing users to access reporting features. Below it, there are buttons labeled '[BETA] New Report' and '[INTERNAL] Old Report' for accessing different versions of reports. The 'Measurement Protocol' button provides access to protocols related to measurement-based care. The 'Schedule Session' button, highlighted with a red border, is used to schedule new sessions or appointments, indicating its importance in the workflow. Below this, the 'Edit Demographics' button allows users to modify demographic information, and the 'Disable Notifications' button is for managing notification settings. Each button is designed to streamline workflow and enhance care delivery.

2). Scroll to the bottom of the Session Details page and click Edit in the Actions section.

The screenshot displays the 'Actions' section of the Mirah Measurement-Based Care interface, specifically for managing recurring appointments. It features three primary buttons: 'Edit', 'Cancel', and 'Delete'. The 'Edit' button, located on the left and highlighted with a red border, allows users to modify the details of a recurring appointment series. The 'Cancel' button, positioned in the center, enables users to cancel the current operation or appointment. The 'Delete' button, on the right, provides the option to remove the appointment series entirely. Each button is color-coded for easy identification: 'Edit' is dark blue, 'Cancel' is orange, and 'Delete' is red. There is also a small magnifying glass icon next to the 'Delete' button, which may be used for additional actions or information retrieval.

3). Click the Recurrence: dropdown in the Time & Provider section and select the frequency you want.

The screenshot displays a section of the Mirah Measurement-Based Care interface where users can edit the details of a recurring appointment. The section is titled 'TIME & PROVIDER' and includes fields for selecting the date and time of the appointment. The date field shows 'Wednesday, Mar. 19' and the time field shows '2:00 pm'. Below these fields, there is a dropdown menu labeled 'Recurrence' with the current selection set to 'none', indicating that the appointment does not repeat. The dropdown menu is highlighted with a red border, suggesting it is the focus of the current action, allowing users to change the recurrence pattern of the appointment.The screenshot displays a dropdown menu for selecting the frequency of recurring appointments within the Mirah Measurement-Based Care platform. The options available are 'none', 'Daily', 'Daily on weekdays', 'Weekly', 'Every two weeks', 'Monthly', 'Quarterly', and 'Every six months'. The currently selected option is 'none', indicated by a checkmark next to it. This menu is part of the workflow for unintegrated customers, allowing users to customize the recurrence pattern of appointments to fit their care delivery needs.

4). Select your desired End Date

The screenshot displays a section of the appointment scheduling interface where users can edit recurring appointments. It shows the date and time fields set to Wednesday, March 19 at 2:00 PM. Below these fields, there is a recurrence dropdown set to 'Weekly', indicating the frequency of the appointments. To the right, there is a field highlighted in red, showing the end date of the recurrence as June 19, 2025. This interface allows users to specify the start date, time, recurrence pattern, and end date for a series of appointments.

5). Scroll to the bottom of the page and Confirm Session with either button
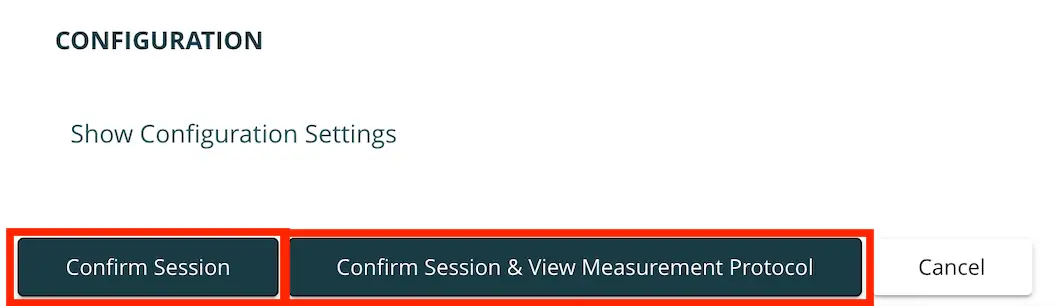
The screenshot displays a section titled 'CONFIGURATION' which is part of the user interface for managing recurring appointments in Mirah Measurement-Based Care. Below the title, there is a text link labeled 'Show Configuration Settings' which likely expands or reveals additional settings related to the configuration. There are two primary buttons located centrally on the screen: 'Confirm Session' and 'Confirm Session & View Measurement Protocol'. The 'Confirm Session' button is used to finalize the details of a session, while the 'Confirm Session & View Measurement Protocol' button not only confirms the session but also provides access to the measurement protocol associated with it. To the right of these buttons is a 'Cancel' button, which allows the user to exit the configuration process without making changes.

Edit a Series of Recurring Appointments​

1). Scroll to the bottom of the Session Details page and click Edit in the Actions section.

The screenshot displays the 'Actions' section of the Mirah Measurement-Based Care interface, specifically for managing recurring appointments. It features three primary buttons: 'Edit', 'Cancel', and 'Delete'. The 'Edit' button, located on the left and highlighted with a red border, allows users to modify the details of a recurring appointment series. The 'Cancel' button, positioned in the center, enables users to abort any ongoing changes. The 'Delete' button, found on the right, provides the option to remove the appointment series entirely. Additionally, there is a small icon resembling a magnifying glass, which may be used for search or additional options, located to the right of the 'Delete' button.

2). Click the Recurrence: dropdown in the Time & Provider section if you want to change the frequency.

The screenshot displays a section of the Mirah Measurement-Based Care interface for editing recurring appointments. The section is titled 'TIME & PROVIDER' and includes fields for selecting the day and date, time, recurrence pattern, and end date of the appointment series. The date field shows 'Wednesday, Mar. 19', the time field is set to '12:45 pm', and the recurrence dropdown is highlighted with 'Weekly' selected. The end date field is set to 'Jun. 18, 2025'. The recurrence dropdown is located centrally and is emphasized with a red border, indicating its importance in the workflow for setting up recurring appointments.The screenshot displays a dropdown menu for selecting the recurrence frequency of appointments within the Mirah Measurement-Based Care platform. The options available are 'none', 'Daily', 'Daily on weekdays', 'Weekly', 'Every two weeks', 'Monthly', 'Quarterly', and 'Every six months'. The currently selected option is 'none', indicated by a checkmark next to it. This menu is part of the workflow for unintegrated customers, allowing users to customize the scheduling of recurring appointments to fit their care delivery needs.

3). Select your desired End Date

The screenshot displays a section of the user interface for editing a series of recurring appointments in the Mirah Measurement-Based Care platform. It shows the appointment date set to Wednesday, March 19, with the time set to 2:00 PM. The recurrence pattern is set to 'Weekly', and the series is scheduled to continue until June 19, 2025. The date and time fields are editable, allowing users to adjust the schedule as needed. The recurrence dropdown is located below the time, and the end date is highlighted in a red-bordered box to the right, indicating its importance in the scheduling process.

4). Scroll to the bottom of the page and Confirm Session with either button
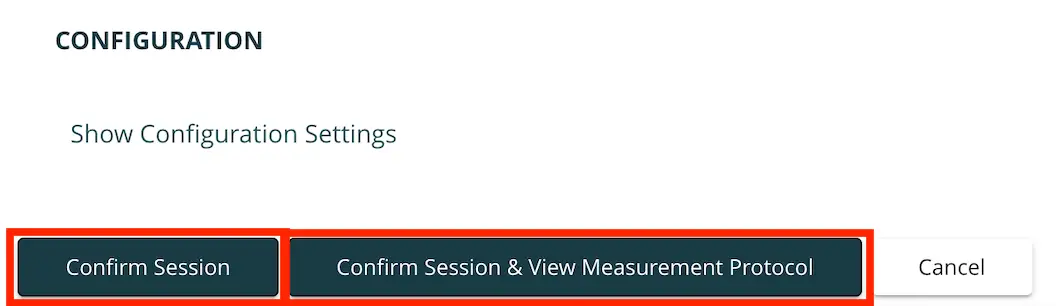
The screenshot displays the configuration section of the Mirah Measurement-Based Care platform, specifically for editing a series of recurring appointments. At the top, the header 'CONFIGURATION' is visible, followed by the option 'Show Configuration Settings'. Below this, there are two prominent buttons: 'Confirm Session' and 'Confirm Session & View Measurement Protocol'. The 'Confirm Session' button allows users to confirm the appointment session, while the 'Confirm Session & View Measurement Protocol' button provides additional functionality to view the measurement protocol associated with the session. Both buttons are located centrally on the screen. To the right, there is a 'Cancel' button, which allows users to exit the configuration settings without making changes.

Delete a Series of Recurring Appointments​

When you manually create a recurring appointment for a client, you can bulk delete the series. Please note, any session that has sent notifications to the client or clinician cannot be deleted.

Please use Step 2 to verify that it is a manually created series.

1). On the Patient Details page, verify that this is a manually created recurring appointment, ensure there is small grey writing on below the appointment time that says Recurrence: ...

The screenshot displays details of a recurring appointment within the Mirah Measurement-Based Care platform. It shows the appointment time set for 9:00 am on Friday, January 10. The recurrence pattern is specified as weekly, continuing until March 5, 2025. This screen is part of the workflow for unintegrated customers, allowing users to view and manage the schedule of recurring appointments.

2). 3. Scroll to the bottom of the page and click Delete.
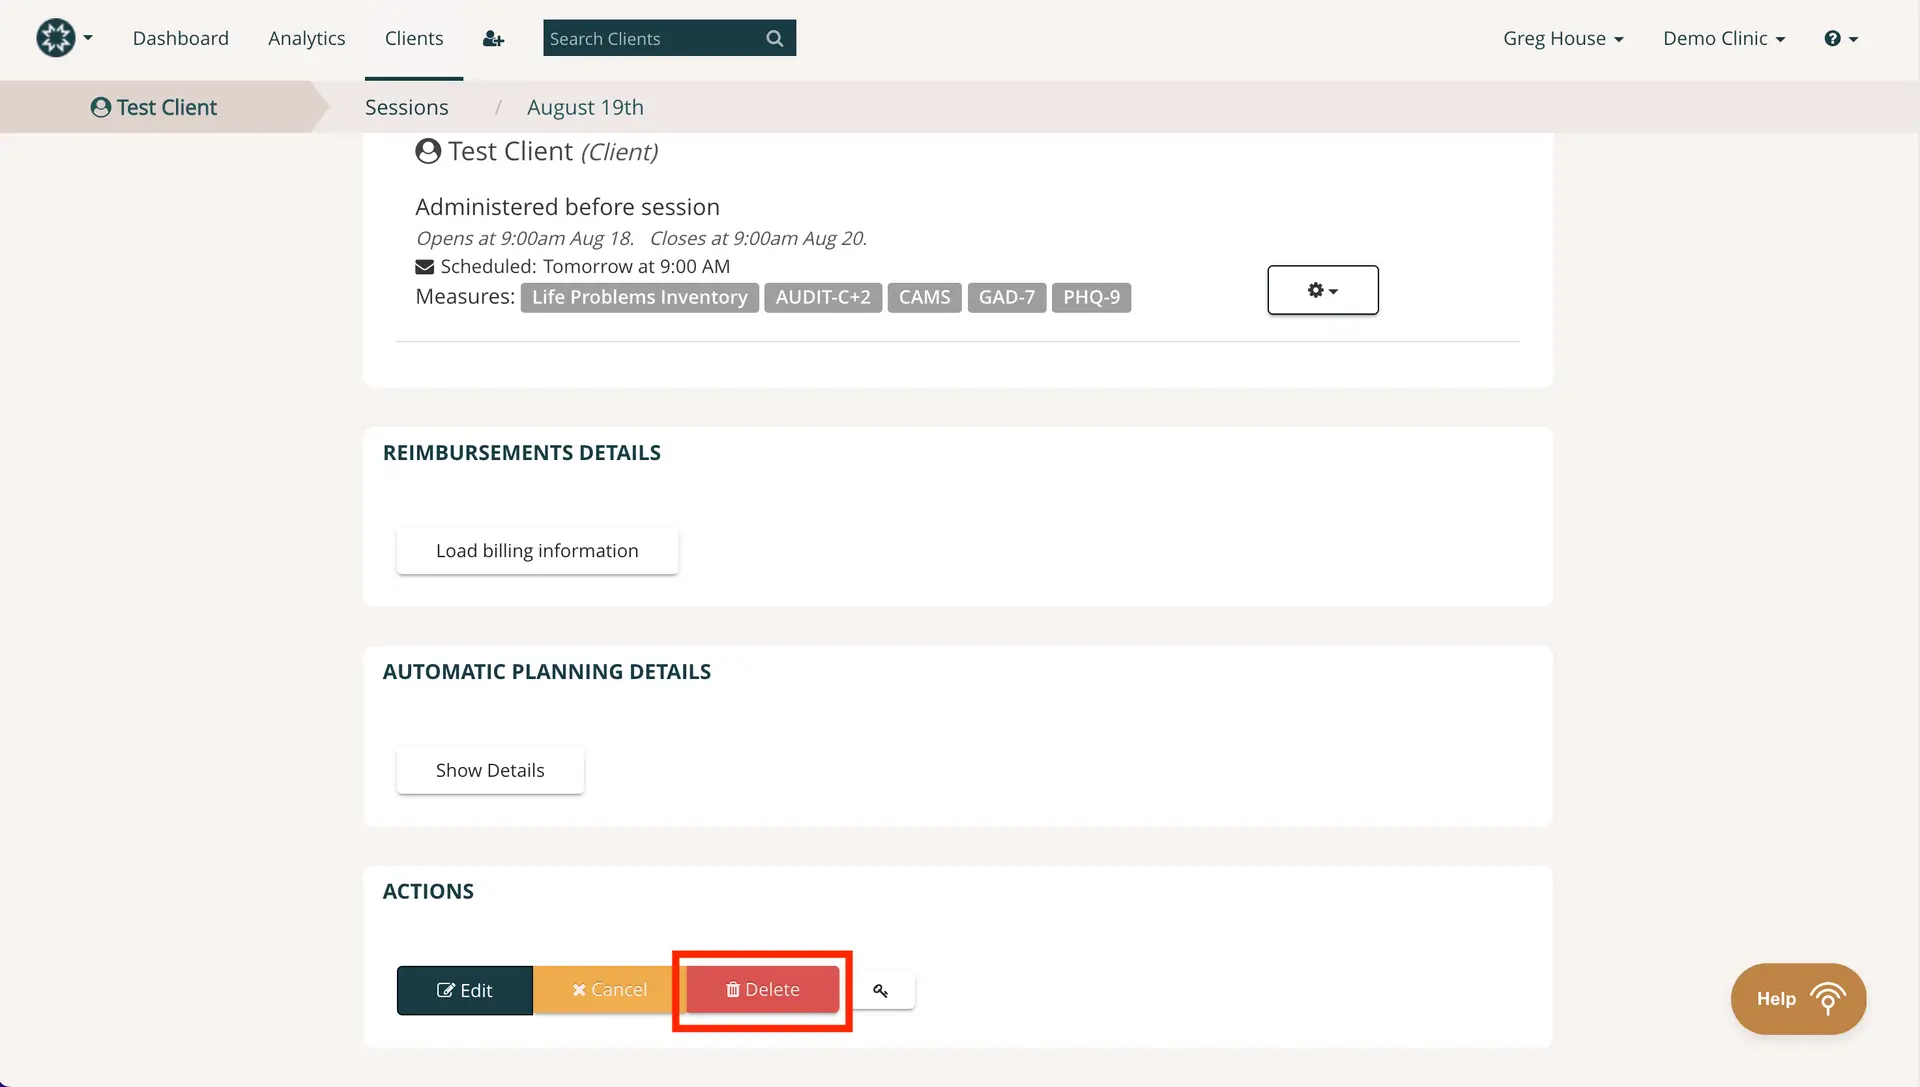
The screenshot displays the interface for managing a session for a client named 'Test Client' on August 19th. The session details include the administration time before the session, opening and closing times, and the scheduled time for tomorrow at 9:00 AM. The measures associated with the session are listed as Life Problems Inventory, AUDIT-C+2, CAMS, GAD-7, and PHQ-9. There are sections for Reimbursements Details and Automatic Planning Details, each with a button to load billing information and show details, respectively. At the bottom, under the Actions section, there are three buttons: 'Edit' in green, 'Cancel' in orange, and 'Delete' in red, which are used to modify, cancel, or delete the session. The 'Delete' button is highlighted with a red border. The top navigation bar includes links to Dashboard, Analytics, and Clients, along with a search bar to find clients. The user is identified as Greg House from Demo Clinic, and a Help button is located at the bottom right corner.

3). A window will pop out with your options. Click Delete all future measurements in this series.
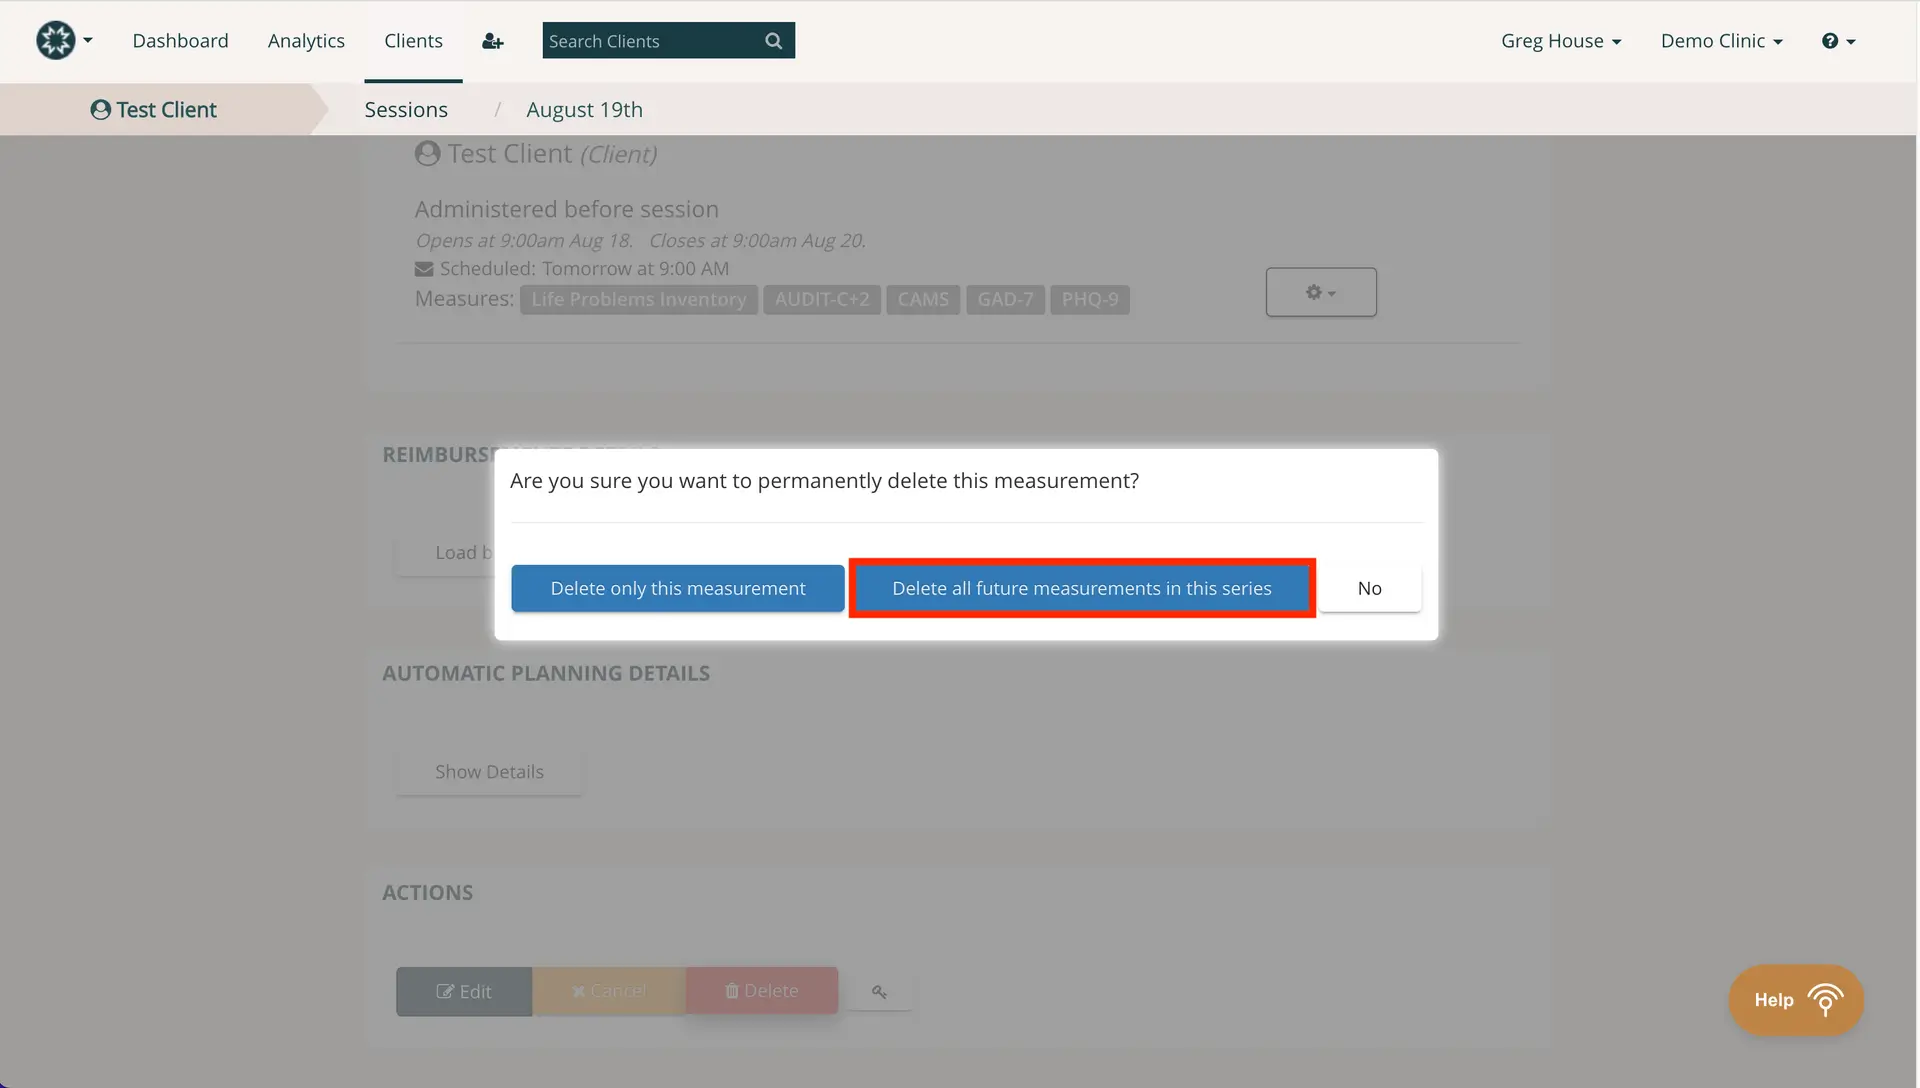
The screenshot displays a confirmation dialog box asking the user if they want to permanently delete a measurement. The dialog box offers three options: 'Delete only this measurement' which is a blue button located on the left, 'Delete all future measurements in this series' which is a blue button highlighted with a red border located in the center, and 'No' which is a button located on the right. The background shows the breadcrumb navigation at the top indicating the user is viewing the 'Sessions' for 'Test Client' on 'August 19th'. The page includes sections for reimbursement details, automatic planning details, and actions with buttons for editing, canceling, and deleting measurements.